Locksmith Training

Expand Your Locksmith Services with Locksmith Training Courses!

Want to expand your locksmith business service offerings? Locksmith training Courses in Metro Phoenix, AZ!

Hands-on classroom training with experienced teachers and all equipment needed for use during training.

  • 4 Days of Classroom and On-The-Job Training in Metro Phoenix, AZ
  • Approx. 8 Hours Per Day
  • Total Cost Only $995

To get started, send us a text and tell us your name and that you are interested in our Locksmith Training Course. Then give us call for more information and to schedule your training.

Car Keys

Methods to Change Door Locks

Are you moving to a new house? Maybe you have a new roomie or could only be for safety purposes? Knowing how to change your door locks is indispensable. It isn’t as difficult as we thought! Keep reading to know the step by step procedure to change door locks!

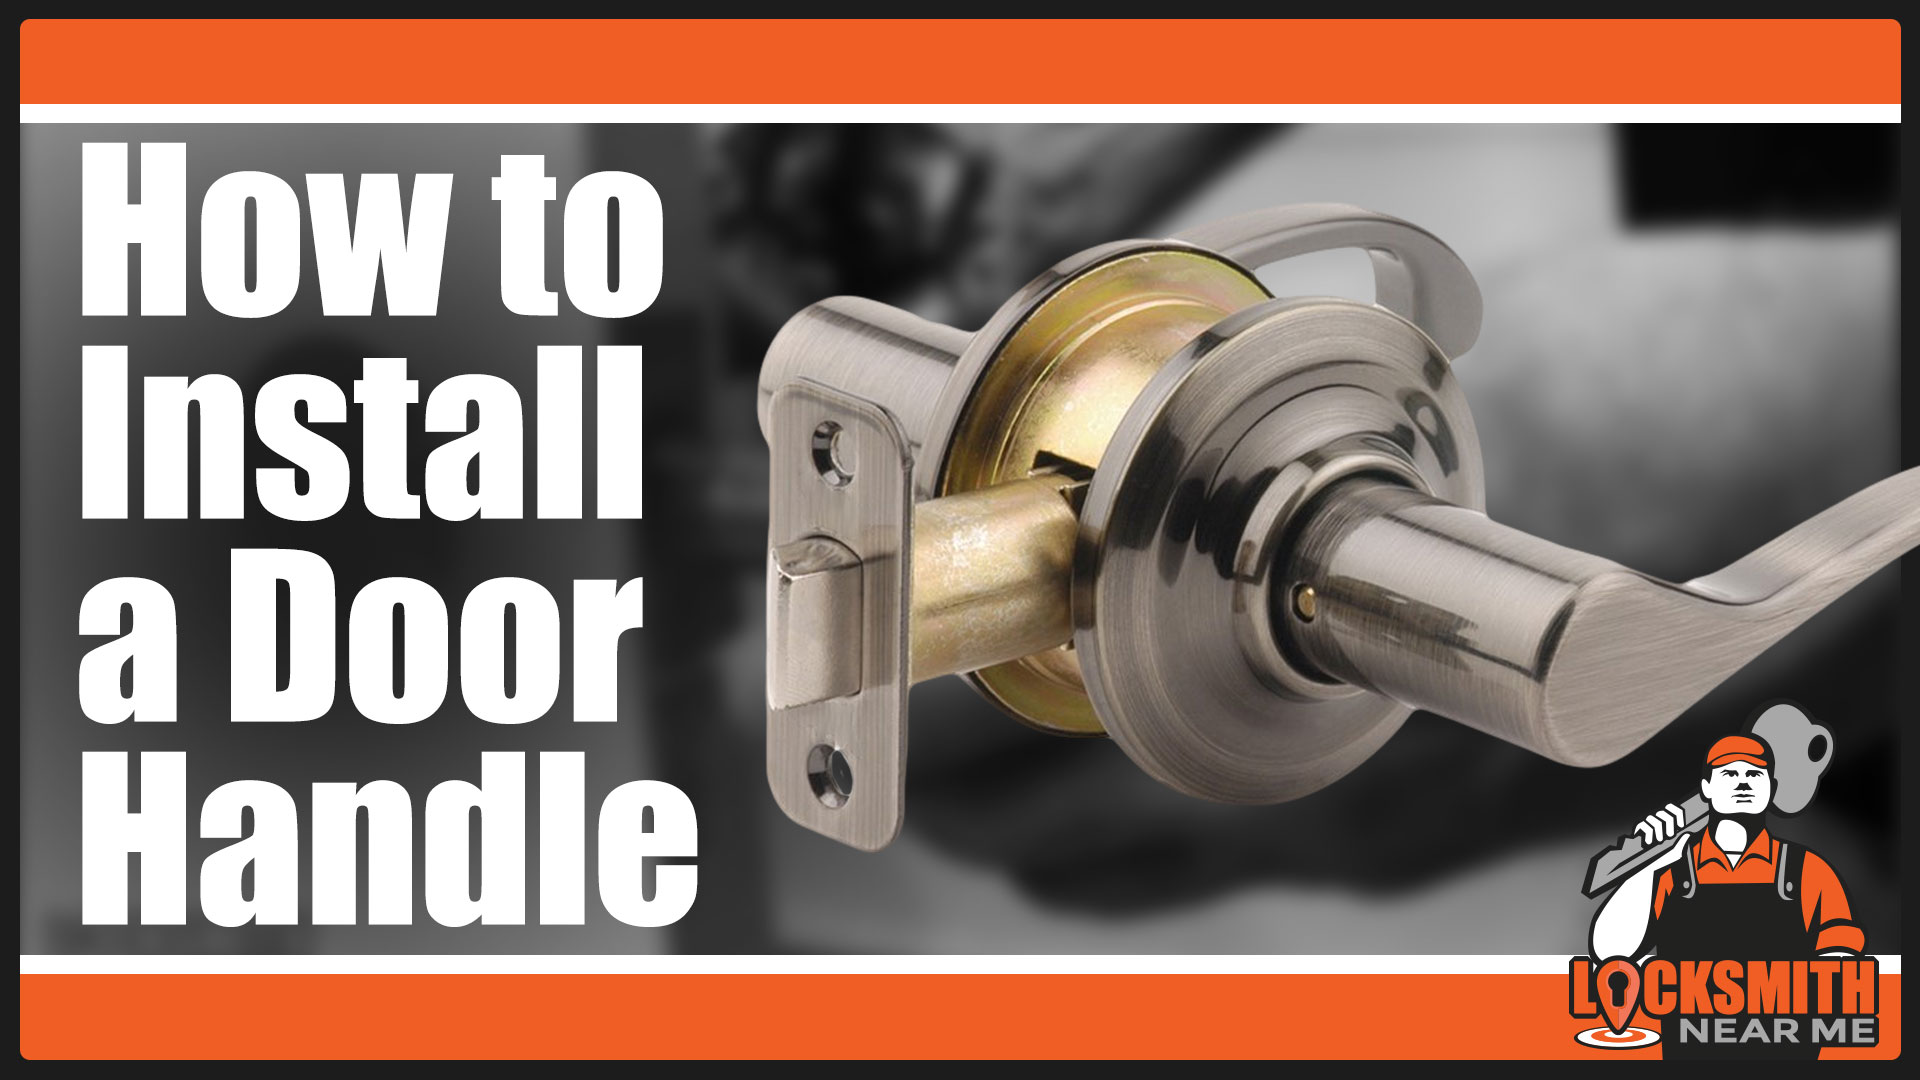
How to Change a Knob Lock

Grab a Phillips head screwdriver. Use this to remove the screws on the inside knob plate. Pull each side’s doorknob away from the door.

In case your knob has no screws on it, the use of a wire tool or a simple paper clip would be necessary. Use the paper clip to release the knob latch by inserting it into the doorknob’s small hole that you can see on its side. Now, you can pull off the knob.

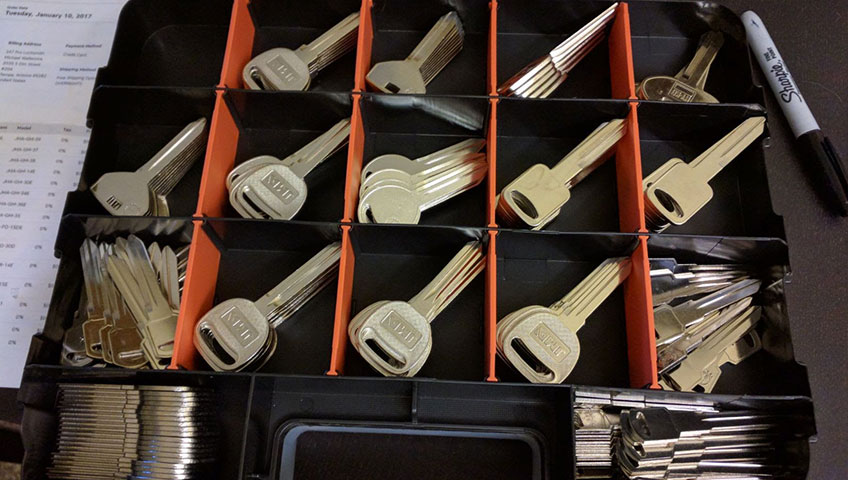
Measuring the diameter of the lock’s hole as well as the distance from its center to the door’s edge is the next step after you have removed the knobs. Make sure to purchase the same brand of your current lock. Also, buy a new lock that matches the measurement of your current lock. This way, you can install your new lock in the existing holes. It will most likely fit the hole’s dimensions.

You can purchase locks online, home improvement stores, hardware stores, or at your nearest locksmith shops.

Next, loosen the two screws holding the latch plate. Once the screws are removed that hold the latch at the edge of the door, you can easily slide it out.

Your purchased new lock comes with a cardboard template. The cardboard template will show you how the lock will fit the door. Enclose this at the door edge. When you are placing the cardboard template over the door’s hole, make sure that all match up. If not match, you purchased the wrong lock.

After your cardboard template matches up, put the new latch into the opening at the edge of your door. Drive and tighten the screws. Make sure you are using new screws because reusing the old ones is not ideal as they are old and maybe weaker.

Finally, it’s time to place the knobs by sliding them through the lock hole toward each other. The outside knob is the one with the keyhole, put it on its respective side. On the other is the inside knob. Slide them through the lock hole toward each other, meeting in the middle and finally connect. Allow the knobs to slide and connect easily. Put the lock back together by driving the screws into the holes on the inside doorknob place.

Change Door Locks: How to Rekey a Lock

You can do rekeying using a kit tagged for its brand if in case you love your existing knobs. This way, you will also do not have to replace the entire lockset.

Always make sure to check your lock’s brand, and then you can buy a kit labeled for it. Rekeying kits work for its specific brand and usually do not work for other locks, so purchasing a rekeying kit that matches your lock’s brand is necessary. You can purchase a rekeying kit online, home improvement stores, hardware stores, or at your nearest locksmith shops.

The next step you need to do is to remove the exterior doorknob by using a wire-like tool that comes with your purchased rekeying kit. Alternatively, you can use a pin to remove the knobs. Unlock the door by inserting your key. Then put the pin into the hole that you can see on the side of the interior doorknob. Now you can pull the outside knob.

In case your lock doesn’t have a small hole, it is best just to replace the whole lock because rekeying will be much complicated for you to do and better off just hiring a locksmith to do it professionally.

Search inside the knob for any plastic sheets or metal that put the lock cylinder in place after you have removed the exterior lock. Slide the plastic sheets or metal, and then put pressure on the key that you inserted into the keyhole in the previous steps. This will allow you to pop the cylinder out of the back of the knob.

Next is you will see a retainer ring that holds or secure the cylinder housing. Grab the wrench-like tool from your rekeying kit. The next step is to slide the tool around the ring and carefully turn the tool to pop the cylinder retainer ring off.

Refer to your rekeying kit again and look for a tube-shaped tool or a cylinder follower. Use the tool to push it through the cylinder housing from the side, which is the opposite of the keyhole. This will allow you to pop the cylinder plug out of the housing.

Make sure to put steady pressure, and the plug and tool are always in contact as you slide the cylinder plug out so that the springs and lock pins do not scatter or fly everywhere.

You will see pins on your cylinder plug. Remove them. Refer to your kit the instructions on how to remove your cylinder plugs old pins.

After removing the old pins from your cylinder plug, put in your new key into the keyhole. You can find the key in the kit. It will also come with numbered or colored pins as well as code instructions. Insert the pins into its corresponding plug slots to match the code in the instructions. When the pins are correctly installed, you will notice that they flush with the plug’s surface and not sticking out over their respective slots.

Shove the cylinder plug back into its housing after installing all the pins. Next is slide the retainer ring back into its place then pop the cylinder into the doorknob. Put back metal or plastic sheets that will hold and secure the cylinder.

Finally, reassemble the exterior doorknob by pushing it into its place in the lock and then carefully rotate the key until the knob locks into place.

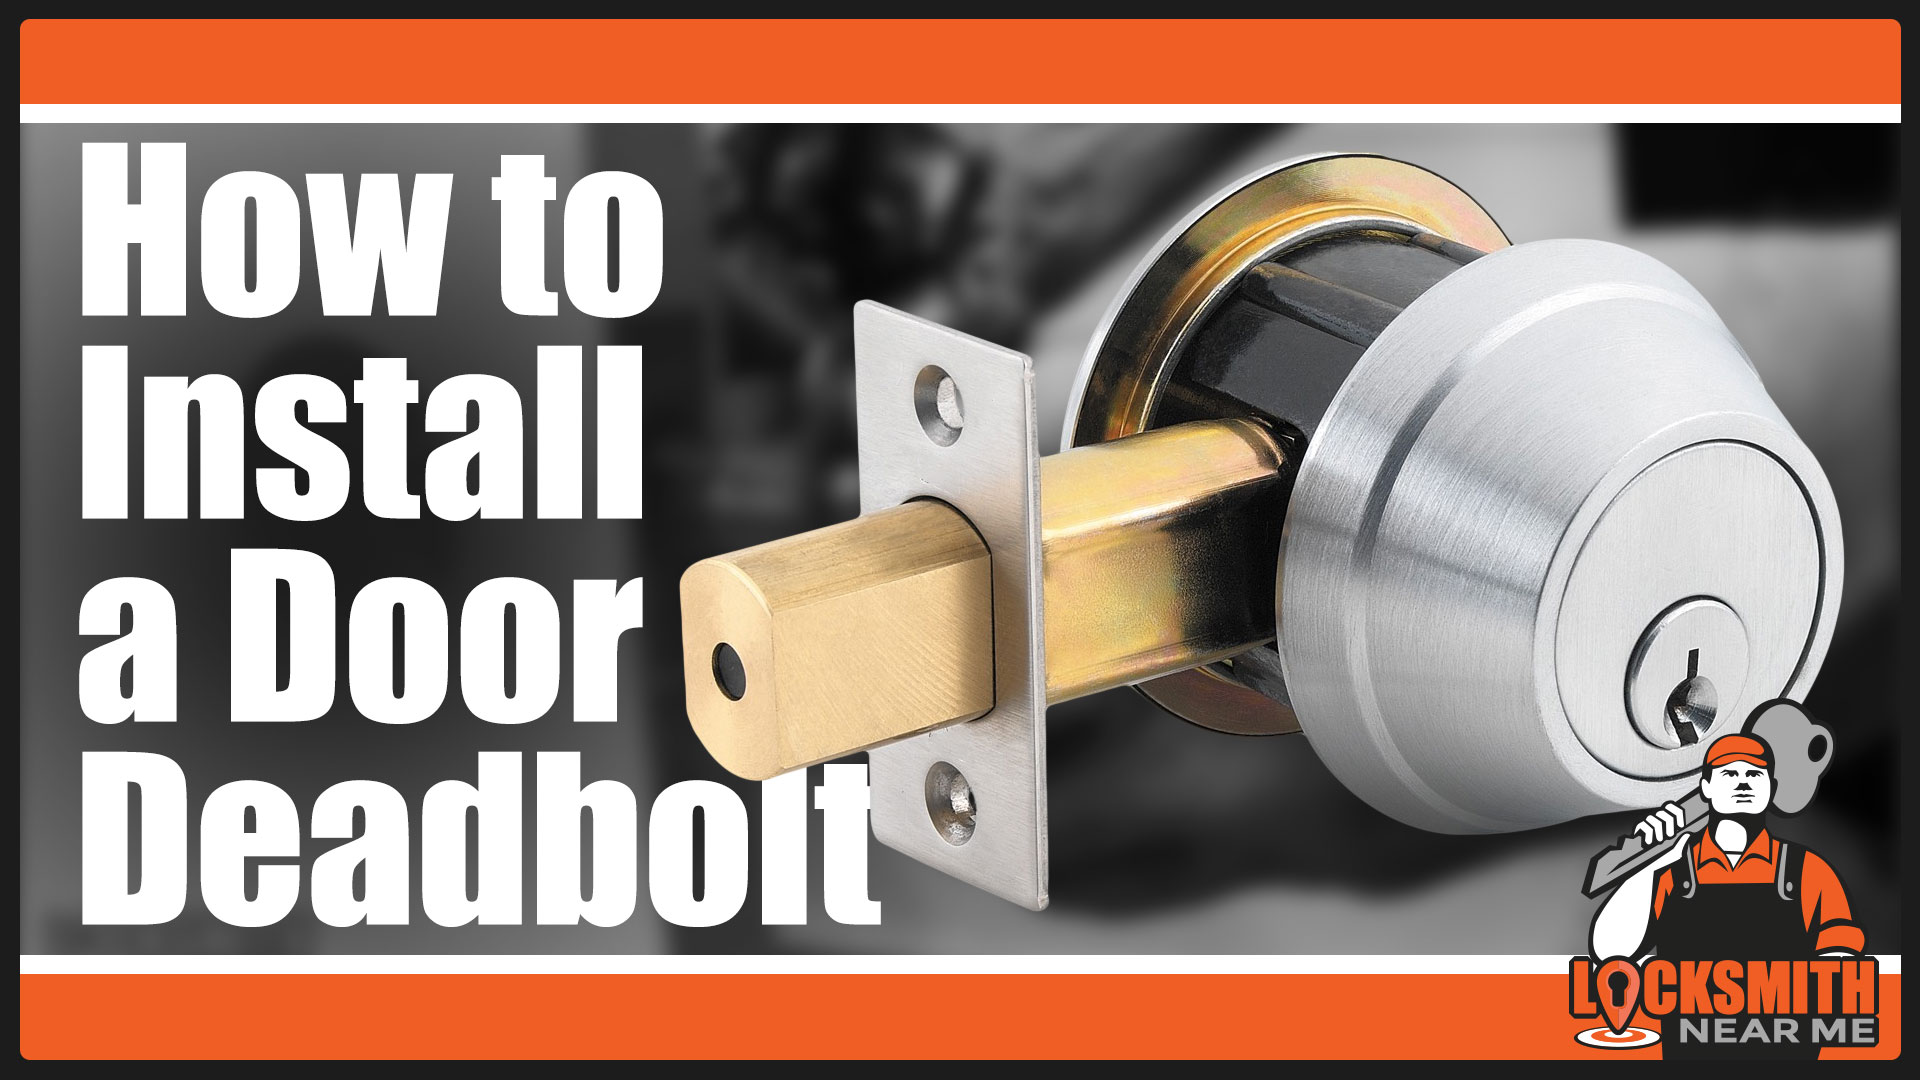
Change Door Locks: How to Replace a Deadbolt

Worry no more if your knob lock is in excellent condition, but your deadbolt needs to be changed because replacing a deadbolt is way more relaxed compared to switching out your doorknobs! The following are steps to replace a deadbolt.

First, you have to remove the screws on the inside plate. Next is to remove the deadbolt’s interior faceplate out by pulling it or rotating counterclockwise. Make sure to hold on the exterior faceplate when removing the interior because it might fall on the floor since some models do not screw it into place. Then remove the outer plate by pulling or twisting it.

Remove the screws fastening the set plate and bolt to the edge of the door. Drive the screws and then pull out the set plate and bolt. Finally, you are done uninstalling your old deadbolt.

Now that you disassembled your old deadbolt, pop out the cylinder housing from the outer faceplate, and then you have to rekey it just like how you would rekey a knob lock that we learned previously on this blog. In case you lost the key, a locksmith can help you make a new key. You just have to bring the parts to the locksmith.

Now it is time to assemble the new deadbolt’s set plate and bolt! In case you are changing the entire lock, make sure to begin by inserting the bolt into the hole at the edge of the door where your old bolt fits. But if your plate and bolt are two separate components, put the new set plate over the cut on the side of the door where your old plate is located.

Secure the new lock by screwing through the set plate to the door. Make sure the screws you are using are new, and it would be best if they match your lock’s color.

To complete your new deadbolt‘s installation, attach the new faceplates, both interior, and exterior, on their respective sides and holes in the door. Drive the screws through the holes in the internal plate, through the holes in the bolt, and into the exterior plate until they are tightly attached.

There you have it! Now you already learn how to change door locks, depending on the type of lock you are using. Apply these steps if you are trying to change the door locks yourself!

Don’t have time to do it yourself?

Locksmith Near Me has mobile locksmiths available now to install, repair, rekey or upgrade your door locks. For immediate service or to schedule locksmith service, give us a call now at (844) 234-5400.

How to install a door deadbolt

How to Install a Door Deadbolt

How to Install a Deadbolt: Door Handle Install Part 2/2

Installation of a Deadbolt

Video transcript of the video showing how install a door deadbolt:

How to Install a Deadbolt: Door Handle Install Part 2/2

"What we have here is an entry-level set and a deadbolt. We have the lever set with a thumb turn and lock. This will obviously go on the outside, this will go on the inside, and locking deadbolt inside and outside. Single-sided so it only takes a key on one side. And we're going to install it in this practice door.

OK, so now we're going to install the deadbolt. Most of them are indicated with a stamp on it telling it which side goes up so that the actuator aligns with where the tail piece is from the deadbolt. This one tells us this side is up. So we'll insert that into the opening. We can see that centered. Depending upon how deep the hole is in the door a lot of these are adjustable. So if that's an adjustable one and you see this is crowded over a little bit you'll want to expand it. If it hits the wood here then it probably needs to be shortened. This one's already preset for the right size. And of course the locking part goes on the outside.

What we're going to do is we know that when the key is turned we want the deadbolt to come this direction. Typically the top of the key way moves in the direction that you want the bolt to go, so in this is instance we want to turn this tail piece as far toward the unlocked position as we can. This is wider than it is tall or taller than it is wide in either case we know it has to go into the actuator with this orientation. So we'll turn it all the way this way and then just back far enough to come through that slot. And we'll take our thumb turn and we'll align it with that actuator. And install the screws."

Watch part 1 of this video to see how to install the door lever handleset.

Need help to help install a door deadbolt? Locksmith Near Me has mobile locksmiths available now to install, repair, rekey or upgrade your door locks. For immediate service or to schedule locksmith service, give us a call now at (844) 234-5400.

How to install a door lever handle

How to Install a Door Lever Handle

Installation of a Door Lever Handle

Video transcript of the video How to Install a Lever Door Handle: Part 1/2:

"What we have here is an entry-level set and a deadbolt. We have the lever set with a thumb turn and lock. This will obviously go on the outside, this will go on the inside and locking deadbolt inside and outside. Single-sided so it only takes a key on one side. And we're going to install it in the practice door.

This is the latch. In this instance we're going to install this as though it's a right-handed door so the door is going to close that way. So this obviously needs to go in this direction so that the door is prevented from opening by this latch on the flat side. So that will go in first. We fasten the latch into the door using the two screws provided.

Now with this half moon shape, in this particular brand, that's going to go inside, this is our lock it lockable side, that's going to go on the outside and this has to match up with the same shape there. And in order to insert that we need to push that slightly inward. Slide it in and then the two fasteners match there.

Then we install the lever. And again, that has a matching half moon on this side to match up with this side and then the little white knob in the center is going to be inserted into this tail piece. And as you can see this is designed with a with a space here that covers the screw hole, so rather than fighting this we're just going to take this off with the provided allen wrench. Take this off for now out of our way. We're going to line this up to where this half moon and that button line up with the tail piece and this actuator here. And now we're going to install the lever and tighten it down with the allen wrench."

Watch part 2 of this video to see installation of the door deadbolt.

Need help to install a door lever handle? Locksmith Near Me locksmiths are available day & night for lock installation, repairs and rekeys for residential and commercial door lock service and maintenance. Call us now at (844) 234-5400.

How to install a garage door slide lock

How to Install a Garage Door Slide Lock

Garage Door Slide Lock Installation

Video transcript of the video How to Install a Garage Door Slide Lock:

"Here we have a couple of common style deadbolts for roll up garage doors. They both function essentially the same in that the latch slides through a hole that is in the rail that the garage door rolls up on, and then you can attach a padlock to secure that so that even if someone pulls the emergency release cord or somehow opens or has access to roll up the door, this physically blocks the door from being able to be rolled up.

The difference between these two is one has levers to actuate it and unlock it, and that can be attached to a cable mechanism or a t-handle on the outside of the garage door that's lockable. This one is simply manually operated both directions to engage or disengage the lock.

These holes have been pre-drilled and I'm also confirming that there's enough room for the bolt to pass through the rail and that there's enough room for the deadbolt to go on. So now we're just going to fasten this in place. Confirm that it works and then we're going to attach an ABUS padlock 83 series that's rekeyable, to a Schlage in this instance, or a Kwikset so that the padlock matches the house key.

Now that's secure. So even if the lock is bypassed or the garage door opener is decoded, this physically prevents the door from being able to roll up. The other feature of this is if someone gains entry to the home by breaking a window or compromising another door, this prevents them from being able to roll up the garage door and haul big stuff out. They have to exit the home the same way they came in."

Click here to watch a video demonstrating how to rekey an ABUS padlock.

Want help installing a garage door slide lock or need the locks on your garage door repaired or rekeyed? Locksmith Near Me is available day & night for garage door lock repair and garage door maintenance and repair. Call now (844) 234-5400.

How to use a lishi lock pick

How to Use A Lishi 2-In-1 Auto Pick & Decoder

Video demonstrating how to pick a car door lock and and decode the lock to make a new key with a lishi.

Video Transcript of How to Use A Lishi 2-In-1 Auto Pick & Decoder:

"This is a Ford door lock. This is a Ford ignition door and trunk two in one pick and we're going to pick this lock and then decode the cuts in the key that would fit this.

So, we can stick that in there, this is our tensioning tool, we'll lift that up out of the way, then we insert the picks all the way to the back. Then we're going to apply tension and then try and find each of these numbers is the wafer location the vertical lines the horizontal lines are the depths of the cut of the key to align those wafers properly in the cylinder to open the lock.

So, now we just this needle here and this needle here are going to indicate if there's a little bit of springiness then we know that that wafer can be moved if there's no springiness then there's either not a wafer there or it's already been picked.

So, it doesn't look like there's a four there we're not getting any springiness there. I'll go to six and we see a little springiness there so we're going to gently push down we got a click. Five. Four. Three. Two, we've got a false set, go back to six. And then we'll decode it. Six looks like a three cut, five looks like a two, four is a three, three is a two cut, two is a two cut, and there's nothing in one.

There we go there's our code. So now we would cut a key to those corresponding depths and it would unlock the door. An ignition has as many as 10 wafers. So we would use six through two that we decoded and then put that into a software program that is subscriber based and then you'll have as many as four or more options as to what those remaining cuts could be to be able to make these existing cuts and the additional three or four cuts correspond to an ignition key that would also turn the ignition. And then the next step after finding that out, is programming the transponder chip in the ignition key to be able to start the car."

Locked out of your car or need new car keys? Locksmith Near Me mobile car locksmiths are available day & night to open locked car doors fast! We can also cut new car keys and program replacement car key fob. For fast and immediate service call (844) 234-5400.

how to rekey a padlock

How to Rekey an ABUS Padlock with Schlage Keyway

Rekey padlock instructional video

Video Transcript of How to Rekey an ABUS 83/45 Padlock with Schlage Keyway:

"So, what we're going to do is rekey an ABUS padlock series 83. Comes in a box like this. This has a couple of features that I'll describe as we go. When you purchase the lock it comes with a one-cut so they're intended to be rekeyed I've already set out the pins that we're going to rekey to this set of precuts.

So, we just simply... first of all open the padlock. This doesn't have the key retaining feature with that cut, so now we're just going to remove the Phillips screw that holds the cylinder core in place with a screwdriver down the shackle hole. That comes out once that's unscrewed the cylinder comes out. Now there's another piece inside and as the screw comes out you'll notice if you can see inside there there's another piece inside that actuator called a Z-bar we're gonna see if we can knock out. Pull it out with tweezers and I'll show you what that looks like. That's this little guy right there and that is the key retaining feature.

If we don't want the key, once we pinned this up with longer pins than the stock cut, this will keep the key in the lock when it's unlocked. So, we'll set that aside right here for now. Now that we have the cylinder out we will use this tool to remove this clip.

I also noticed that this has a detent. What that does is it only enables the cylinder to turn that far. Okay so we need to press that in in order to remove the cylinder. You also saw this come out when I removed that clip, this is the actuator, there's two different lengths on the backside. The shorter side here rides against this detent pin, so when you replace that make sure that this in indented part is on the same side as the detention pin. So, we'll set that aside.

Then we'll put the key in and we'll use the follower and simultaneously we'll press down the detent and remove the core. The detent pin does not come back out it's got a keeper in there. So, these are all of our one cuts from the factory so we're just gonna dump those out and now we'll pin this up for this key and I've already laid the pins out there so we'll drop these in.

Now you can see the cylinder will accommodate six pins, we're only using a five pin key so we won't put anything there, however, after the fact if you want to add a sixth pin this comes with this

kit which adds another top spring, another driver spring, and a plate to cover the top spring so you don't have to remove the whole cylinder if you want to add a sixth pin to key that."

So, now that we've got this pinned up and lined up, well, flush, confirmed all the pins are there we'll put this back in. And again, we have to be mindful that we have a detent there. So, there's probably a better tool than a fingernail but that works. So, now that's in place. Now if we were going to add a sixth pin to this after the fact, this hole right here is where you would put your top, you'd drop your key pin in there then you drive our pin and you can see that's a spool security pin and the spring. And then this little plate slides in right there to keep your spring down so you can add a sixth one without having to remove the cylinder.

Also, by the way, there are spool and serrated driver pins in this lock from the factory so there's already an added layer of security in these against picking. So now that we confirm that this works, our detent is there, our cylinder is not going to come out, we can pull the key out and then we're going to our actuator making sure that the cut out part is on top of the detent. Then we'll add our clip back in. And this little notch here goes into the bottom of the key way and it holds our actuator in place so it has to be centered when you put that back on.

Then here's our Z-bar, now you'll notice on one side it's solid on the other side there's a black dot. When you want the key active the key retaining feature activated this needs to be in place but it also needs to be in place with that black dot showing.

There we go. Now we're gonna put the key in there just in case we have to turn that a bit in order to get it to seat back in there.

Okay hear that click that's all the way seated you can see the cylinder face is flush with the lock body and then we'll drop our screw down in there. And now you can already see the key retaining feature is in place because I cannot turn this back horizontal to where the pins come out of the Bible into the cylinder and be able to remove that key. So that confirms that the key retaining feature is in place. The advantage of this feature is that if someone has a lock that they don't want floating around in the unlocked position or they've got multiple padlocks that are keyed differently they're not fumbling around for the right key when they want to go back and lock it they can't lock this into place unless they have the key with them so the key retaining feature adds another level of valuable features. If you don't want that done so this won't come out unless it's locked that's the key retaining feature. To disable that all we would have had to have done is leave that Z clip off the actuator still opens the lock and then the key is removable.

There you go."

Watch video showing how to add or remove the z-bar retainer on an ABUS padlock.

Need to rekley a padlock or other door lock? Locksmith Near Me technicians are available now for lock rekey, lock installation and repairs. Available day & night so call us now at (844) 234-5400.


How to add remove padlock key retainer

How to remove the Z-bar retainer on an ABUS padlock with a Schlage key.

Add or remove padlock retainer

Video transcript of How to Add or Remove the Z-bar Key Retainer on an ABUS Padlock

In the video above we show you how to easily remove or add the z-bar key retainer. The retainer prevents you from removing the key from the padlock when the shackle is in the open position. This can prevent you from accidentally leaving it unlocked or locking the key inside whatever you are securing.

"We're going to go over how to eliminate the key retaining feature on this ABUS padlock that's keyed to a Schlege key. Right now, the way the lock functions works, you put the key in when it's unlocked. You can't turn the key back and remove it. That's a key retaining feature. So, the way that we eliminate that feature. Open the lock with the key. Take a Phillips screw driver. Remove the core and there's a little Z-bar in the bottom of the actuator well. I'll knock it out of there and you can see. This is the little Z-bar that is in there that's what retains the key. Without that we put the lock back together secure the core back in the lock remove the key insert the key unlock it and we can remove the key and lock it without the key. If we want to reinstate that feature, then we simply remove the core. Make sure that this little black dot is showing. That side goes up. And this goes in that little notch in the middle of the actuator. Then we slide the core back in. You may need to turn the key to seat that properly. You hear that click. Our screw is still in the shackle hole. Secure that then we can remove the key. See the key unlock it but it won't turn back to the home position and be able to be removed unless it's locked again, and it snaps back into that position.

And you're done."

Watch the video showing how to rekey a padlock.